
Home canning: A pandemic skill that will serve you well
- Apr 2, 2021
- 12 min read
Updated: Jan 10, 2022
I've been 'canning' and preserving food for about 50 years. Really. Starting when I was about 15 years old. My female relatives all did it. That was simply the culture where I lived. I was fortunate enough to have nearby 'aunties' who - with my mom - were generous with their time and knowledge, and did we ever have fun!

Segment on home canning and preserving, featuring yours truly.
Back in September 2020, before I'd created this website and blog, I was contacted by a broadcast journalist friend - Terri Russell of KOLO-TV, Reno, Nevada. She wanted viewers to know more about the art and skill of home canning, particularly during the pandemic quarantine, and I was happy to share. She and her photographer filmed while I cooked an Afro-Caribbean style sauce.

This sauce was inspired by my travels to West Africa, and was wonderful with some frozen okra and corn, and ladled over some pasta!
But, this isn't about just one sauce. Learn the basics of canning, and you've stepped into a world of possibilities. From humble canned tomatoes from your own garden, to jams, chutneys, sauces, fruits and vegetables, your own condiments like ketchup and more. Learning to 'make your own' can also be healthier! So many of the commercial products have far too much sugar and salt for me. I know this, since I once worked with a couple of local co-packer firms, and it was astonishing - and a little discouraging - how much sugar and salt they recommend using. Let's face it, salt and sugar are cheaper 'fillers'. Then, there are the preservatives! Yikes. Who needs that!
It's so satisfying to see a pantry filled with the fruits of one's garden labors! Even in the middle of winter, you can have a fond memory and taste of summer.
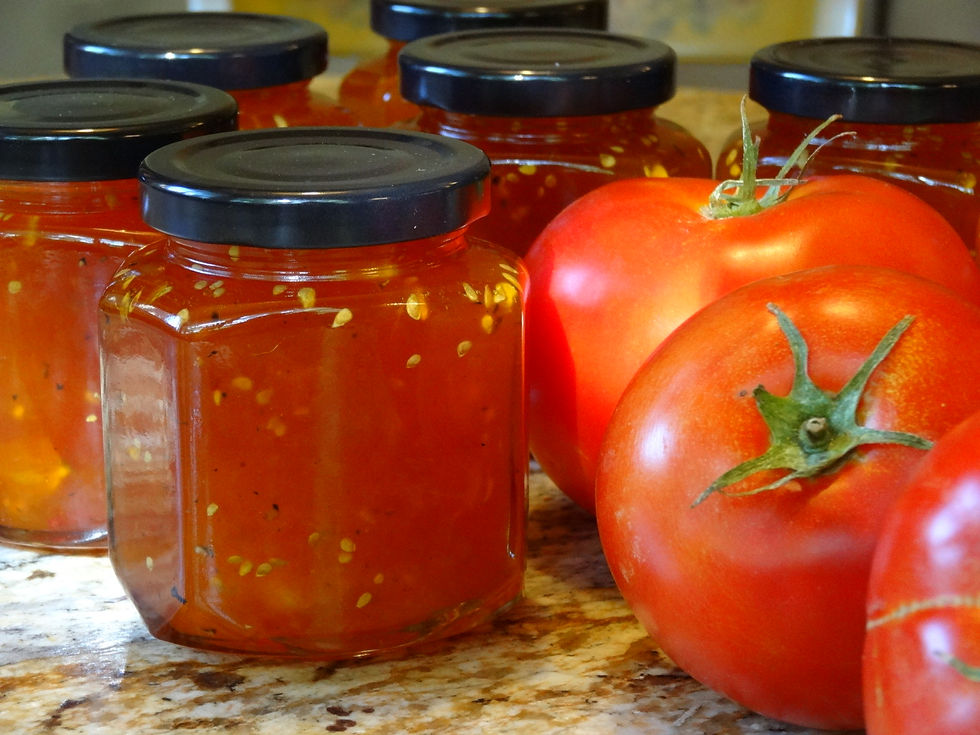
Knowing how to can/preserve allows you to take full advantage of seasonal fruits and vegetables. Last year, I had a bumper crop of tomatoes. About 75 lbs in all. Most of it went into jars on the pantry shelf as Marinara Sauce, Afro-Caribbean Sauce, or just as a Soup Starter.

A friend here in Reno, Nevada had a bumper crop of blackberries a couple years ago, and when he said "do you want some?", I made record-breaking time up to his house!
Of course, you can preserve all manner of fruits, making use of the summer bounty. Jams and fruit spreads are merely a starting point. Last fall, I had neighbors who kept giving me these funny little pears from their yard. I turned those pears into an Indian-style Chutney that was so good, that the folks with the pear trees insisted on the recipe. That gave me pause. I didn't have one. Snort. I quickly wrote out a close approximation, and gave it to them. She was an experienced 'canner', so she could figure it out. That's the sort of confidence that I want to impart to you.

I go a little nuts at farmers' markets! Raspberries are one of my favorites for jam!
I don't preserve/can vegetables much anymore, since IMHO, frozen is better, but you can still turn vegetables like an over-abundance of zucchini squash, asparagus, okra and more into pickles and relishes, just for example.

This is pretty typical of my pantry after a long and bountiful summer season.
Not only can you can save a lot of money, and have a pantry filled with handy gifts to give at holidays or for the new neighbor!


Gotta taste ... adjust, and taste some more.
Setting up your workspace is crucial to success when canning/preserving. I work from left to right (or right to left from your vantage point) ... with a big pot of hot water to boil my jars and lids, my cooking pot, and then the space to set tools and fills the jars.

I prefer to use jars from SKS Bottle & Packaging. The jar shapes are more interesting - and I can get a wider variety of sizes, plus colored lids (by the bag of 150!). I've used the jars over so many times that they've more than paid for themselves. The link I've provided (above) will take you to the hexagonal jars that I've used for years. I use the 6 and 9 ounce jars. Look around on the site and you'll see a ton of different types of jars, including 'Mason-type' jars and bottles! Dare you to not be tempted!

As you can see above, I have some shelves in the garage - convenient to the kitchen - that are devoted to storing all my jars and canning supplies!

Boiling jars and lids for sterilization is very important. But, you don't have to do it on the stove top. Actually, you can set the empty jars - lids off - on a clean cookie sheet (or directly on the racks) and do this in the oven. Set your oven at 225 degrees, preheat, and 'cook' the jars and lids for a minimum of 20 minutes. But, here's why I don't generally do this: I do a lot of my canning in the hot summer months, and it simply makes the kitchen - and house - too hot. But, it's still an option if you have a small stove top and limited space.
Now, let's talk about the 'equipment' you'll need.

I've used the Mauviel copper jam pots for many years, but you don't need to go to this expense, especially if you're a beginner or occasional jam maker. As I said, I've had these for years, and didn't pay anything like what they cost now. If you find that you love canning, then try and score something on ebay. That said, any heavy bottomed pot will do the job just fine! Flared sides, as you see with the Mauviel, help allow for faster evaporation of the water content - which is essentially what jam making is about. You're getting rid of a lot of the water from the fruit. The sugar is your preservative. Fresh lemon juice is what helps to develop 'gel' - particularly when (in the French tradition) not using pectin.

You'll need a good funnel if you intend to get beyond the beginner stage. This big bad boy is my 'go to' as it fits a number of jar opening sizes. I don't recommend plastic funnels, since you're using a funnel with really hot liquid. A cheap funnel could melt, and in any case, could impart 'off' flavors. Go metal.

You'll absolutely need a 'jar lifter' set of tongs. This allows you to lift the very hot filled jars out of the water bath without scalding yourself.

These are a 'nice to have' item. For years, I've shopped kitchen stuff at my local restaurant supply store - Resco, here in Reno. I couldn't live without my big plastic basins. I put my fruit and sugar (and lemon juice) in them, and let it sit on the counter overnight to macerate. These are indispensable for any sort of full scale, summertime canning and preserving activity. They're bullet-proof and will last for years. Oh, and pretty inexpensive. Obviously, you can/should start out with large bowls or similar.

I enthusiastically recommend a kitchen food scale! If you prefer to keep it simple - and not struggle figuring out proportions of ounces and pounds - use grams and kilograms. My food scale does so at the push of a button. And, it also has a 'tare' function that allows you to 'zero out' ... say you've just measured the weight of your fruit, and now want to measure the sugar by weight. Press the tare button to zero out and measure on!

I also use a pair of plain kitchen tongs to grab my sterilized jars out from the hot water, tip and drain them into the pot prior to setting them out to fill.

When doing some jam, you'll need a few really cold spoons to 'test' the 'set' or gel of your cooked jam. I have a bunch of spoons like this for cooking, and just put them into the freezer, taking one out as needed. I spoon a bit of hot jam into one and set it on a shelf in the refrigerator for a few minutes to see how thick the jam will be when cold.

After the cold spoon spends a few minutes in the fridge, run your finger through the cooled jam. If the track of your finger doesn't fill in immediately, you're good to fill jars.
Thickness can be a personal preference. I like jam to be very spreadable - and err on the side of a tad 'thin' or 'loose'. Every once in a great while - usually when I have somebody in the kitchen, and I'm talking rather than paying attention - I'll let it get too thick and stiff. I don't like that.

Learning to do jam this way negates the need for using pectin - which also causes jam to 'set'. Years ago, I was whining to a French friend about how fussy, hit and miss, jam making with pectin could be. She looked at me and said "Why are you using pectin? Why not do it like the French do? Boil the crap out of it until it gets thick and put it in a jar." Valerie is a hoot.
Pectin (made from apples, which are very high in pectin) is sometimes useful - but, only if you're trying to make jam out of fruits that have a very low natural pectin content. Pectin is a polysaccharide starch found in the cell walls of fruits and vegetables. In terms of food composition, pectin is a gelling agent. It partially mimics the effects of gelatin, but unlike gelatin—which is sourced from animals—pectin comes entirely from plants. Fruits high in pectin - such as apples, aren't easily squashed. They have a lot of the 'glue' or starches holding them together. Berries, for example, don't. But, even then - and I'm talking about strawberries, raspberries and such - I still don't need it. Just cook it a bit longer and you'll have a nice thick, spreadable jam. Another reason that I don't use pectin is that you have to follow a more rigid recipe of proportions/ratios. That isn't me. I like to nip and tuck, bob and weave. If I want to add something, I don't want to rewrite the recipe so that the pectin works perfectly.
Well, now you probably want to make some jam, right? Keep it simple. Don't make a big investment in fruit. Buy a couple bags of frozen peach slices. Or, blueberries, blackberries or 'mixed berries'. Let them thaw in the fridge, or help them along in the microwave. Don't 'cook' them, just defrost/thaw the fruit.
You'll see the weight of the fruit on the bag. Make a note of that. Combine for the total of multiple bags. Then, my 'Rule of Thumb' ratio for sugar is 55% of the weight of the fruit in sugar. Example: for 1,000 grams of fruit, I would add 550 grams of sugar. Get it? If you want to fiddle around with non-metric weights and measures, be my guest.
Next, add the juice of one big lemon. Do NOT use bottled lemon juice. DO. NOT. DO. THAT. You won't get a consistent acid content and it doesn't taste the same. I use one large lemon per 1,000 grams of fruit, generally speaking.

I'll usually also grate some lemon zest into my jam. Do that before you juice the lemon. Zesting juiced lemon peels is annoying. Oh, and see how I put my fruit and sugar into those restaurant basins? Yup. Now, cover the top of your basin/bowl with a tea towel, plastic wrap, or my choice, the elastic 'shower cap' food covers. Let it sit out on the countertop overnight. No, you don't refrigerate it. This gives the sugar a chance to thoroughly permeate the fruit.
I always add a pinch or two of salt to 'round out' the flavors.

Above is a basin of frozen/thawed 'mixed berry' jam that I'm macerating overnight. With something this 'chunky' you'll really want to use the hand-held immersion blender to smooth it out! Trust me.

See the covered basin of peach jam in the background? I'd finished up the dark cherry and got my peach ready to sit out overnight so that I could cook it the next morning. No, your jam isn't going to 'go bad' (eye roll) by sitting out. In all honesty, it could sit out two days like this, and be just fine.
Before I pour the jam into my cooking kettle/pot, I'll take a hand-held immersion blender and get it to some version of smooth and spreadable. Some folks like it chunky, with bits of fruit. I don't. Then, pour it into your cooking pot. Bring up the heat to high, and get it boiling vigorously. Stir constantly - and I use a wooden spoon that I only use for jam for this. It's a long wooden spoon. When jam cooks it tends to pop and when it lands on your arm ... "ouch". As the jam begins to thicken slightly - and you can tell by the feel of the spoon across the bottom of the pot - reduce the heat to about medium. Let it bubble away for perhaps ten minutes, stirring regularly. One reason that I love copper is that it heats so evenly - and doesn't have 'hot' spots.
As you can see above, the jam is becoming thick. It's also popping. So, I suggest you use a longer handled spoon, or wear long sleeves.
Test for 'set'. If you run your finger through cooled jam (using a cold spoon and putting the filled spoon in the fridge for a bit), and it doesn't run back together, you're good to go to the jar filling stage. When I figure that I'm close to 'set' (and may have done 2-3 spoons like this), I'll fill a spoon (cold spoon filled with hot jam) and lay it in the refrigerator for about 3-5 minutes. You can turn your jam pot off while you do this, so to avoid getting overly cooked.

Now, it's time to bring your hot, sterilized jars out of the water, and set several out on a towel to be filled.

Have your 'filling station' ready to go: kitchen towel, hot sterile jars and lids, a spoon to tweak the amount in the jar (take a bit out, put a bit more in), and a damp paper towel to wipe the jar lids down before putting the lids on. This process is exactly the same with the old fashioned Mason/Kerr jars with the two-part lid with ring. Don't think you'll need to do anything different.

Put the funnel in the hot jar and ladle the hot jam into it.

There are three things for the novice jam maker to note here.
1) Pay close attention to 'headspace' or the space between the hot jam and the very top rim of the jar. Too little and it can leak out into the water bath, and too much and the jar won't seal properly. On these jars, I try for approximately halfway between or more specifically one-quarter inch of headspace. That's why the small spoon - to make this adjustment.
2) Wipe that rim! Any drips of jam or other 'stuff' on the rim and the seal will fail. A quick, but thorough swipe with a dampened paper towel will suffice.
3) Learn to 'tighten' the lid. Don't over-tighten or a seal won't develop. Under-tightening can allow jam to leak out. It takes a little experience to know where that sweet spot is. What I tell people I've taught: A light, quick twist just until you feel the first 'resistance' to twisting. Sort of like when tightening screws and bolts: Finger tight, but a little less.

Lower your filled jars into the hot water bath. No, you don't need or want a 'pressure canner' for this. This hot water bath is how I've been doing it for decades, and my aunties before me. It works.

Don't put too many jars into the hot water bath at once. I had three jars of this jam, but I could have fit no more than five in this pot. You can 'hold' additional jars for the time it takes to 'process' these.

Bring the water - covering the jars by about one inch - to a full rolling boil, and slap on a lid. The processing time can vary by altitude. I live in Reno, Nevada and the altitude at my house is about 4,600 feet above sea level. Fifteen minutes of processing works just fine. I suggest that you start there. You can check with your local Extension Service for recommendations. After about five minutes of boiling, covered, I reduce the heat to about medium. Be sure to set a timer, just for convenience sake. It's not going to hurt anything if you process for 20 minutes, but you'd probably like to finish this.

After processing, remove the jars and set them on the counter. Over the next ten minutes or so, you'll be listening for the distinctive 'pop' as the center dimple of the lid gets sucked in as the jar cools and seals. Every once in a while, even I get one jar that fails to seal. Usually it's because I got distracted and didn't fill it enough. Or, I over tightened the lid. You can re-process a jar where over-tightening was the issue. If you had enough extra jam leftover, you can add some and reprocess that, too. It's generally not worth it though. I just put it in the back of the fridge and use it when I've run out of other open jars.
How will you know that you have a good seal? Easy. Tap and listen.
Let the sealed jars cool at room temperature, and then you're free to label and store them.

Good for you! You've just developed a wonderfully useful skill that will serve you well over the years. Now, all that's left to do is to sample some of your work!
You might be wondering about a recipe. Huh?
Fruit, by weight.
Sugar, 55% by weight of the fruit.
Juice of one big lemon.
A pinch of salt.
Yes, you can get all sorts of preserving cookbooks. I have most of them. Want them? Actually, I've given most of them away. The one book I won't give away is the Flavor Bible. It's still my stained and dog-eared 'go to' for getting creative with flavors. It tells you if, indeed, it's wise to add this flavor to that ingredient. I regularly add splashes of aged Bourbon to peach jam. You can and should play with herbs and spices! Mexican chilies (Ancho!) are killer with blackberry jam! Add some cracked black pepper and a splash (or two) of brandy to cherry jam.

Hey, if you like or make this dish, would you mind posting the recipe to Yummly? I'd really appreciate that. The Yummly icon is on the right side of this webpage. Oh, and saving to Pinterest would also be great! Each photo should have a Pinterest icon in the upper left corner! Thanks!
This button will take you to PayPal where you can securely pop a bit in the 'tip jar'.
Thanks!


Comments